Resizing images on a Mac is a common task for photographers, designers, bloggers, and everyday users. Whether you’re optimizing images for a website, social media, or print, an image resizer for Mac can make the process seamless. macOS provides built-in tools, and there are numerous free web and desktop apps available to suit various needs. Below is a detailed guide on the top 10 methods to resize images on a Mac, starting with the default macOS app, followed by popular free web tools and desktop apps, ensuring you find the ideal Mac image resizer for your workflow. Before resizing, consider learning how to back up your MacBook to protect your original files.
Top 10 Ways to Resize Images on a Mac
1. Preview - Mac Default App
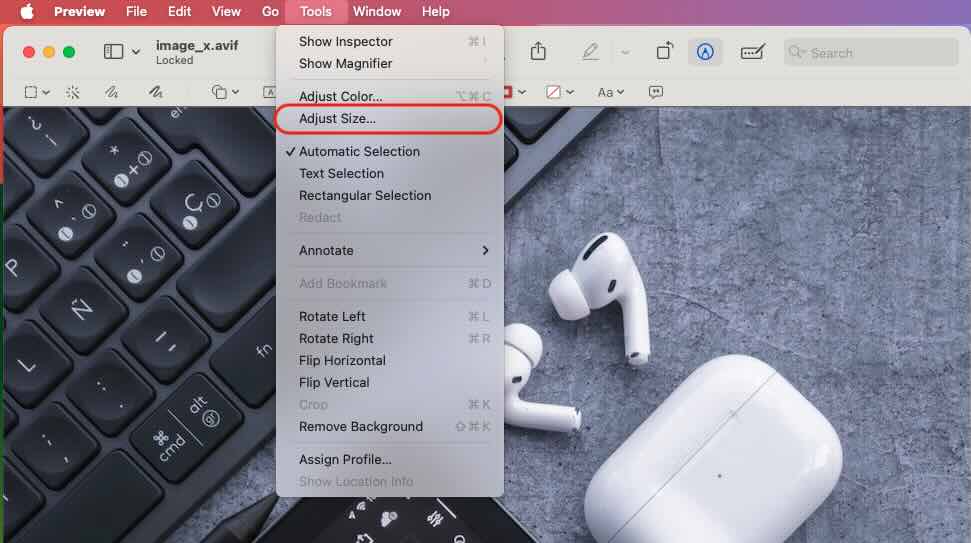
The Preview app, pre-installed on every Mac, is a versatile and free image resizer for basic editing tasks like resizing. It’s perfect for quick adjustments without additional software, especially when preparing images for sharing or projects like FaceTime photo edits.
To learn where FaceTime photos are saved, check out this step-by-step guide.
How to Use:
- Open the Image: Right-click the image and select Open With > Preview, or double-click if Preview is your default viewer.
- Access Resize Tool: Go to Tools > Adjust Size.
- Set Dimensions: Enter the desired width, height, or percentage in pixels, inches, or other units. Check Scale proportionally to maintain the aspect ratio. Adjust resolution (e.g., 72 DPI for web) if needed.
- Save Changes: Click OK, then save (File > Save) or export to a different format (File > Export).
Pros:
- Free and built into macOS.
- Intuitive for single-image resizing.
- Supports formats like JPEG, PNG, and TIFF.
- Lossless resizing when configured properly.
Cons:
- No batch processing without automation.
- Limited features compared to specialized tools.
Best for: Casual users needing a quick, single-image resize.
2. Pixlr
Pixlr is a popular, browser-based image editing platform with a free tier that includes a robust image resizing feature. It’s an excellent online image resizer for users who prefer not to install software, offering flexibility for tasks like preparing images for the web or social media.
How to Use:
- Visit Pixlr: Go to pixlr.com/editor
- Upload Image: Click Open Image to upload your file from your Mac.
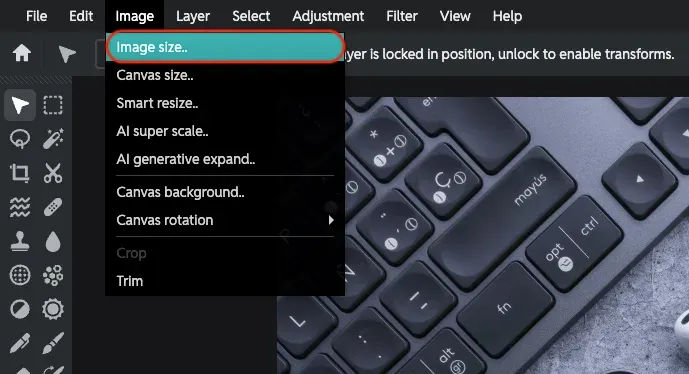
- Resize: Select Image > Image Size. Enter new dimensions or a percentage, ensuring Constrain Proportions is enabled.
- Download: Save the resized image as JPEG, PNG, or another format.
Pros:
- Free with no installation required.
- User-friendly with additional editing tools (e.g., cropping, filters).
- Accessible on any Mac with an internet connection.
Cons:
- Requires internet access.
- The free tier includes ads and limited features compared to premium.
- Less efficient for large batches.
Best for: Users seeking a no-install, versatile online resizer.
3. GIMP
GIMP (GNU Image Manipulation Program) is a powerful, open-source desktop app comparable to Adobe Photoshop. It’s a free Mac image resizer that supports advanced resizing, including batch processing, making it ideal for complex projects.
How to Use:
- Install GIMP: Download from gimp.org and install on your Mac.
- Open Image: Launch GIMP, go to File > Open, and select your image.
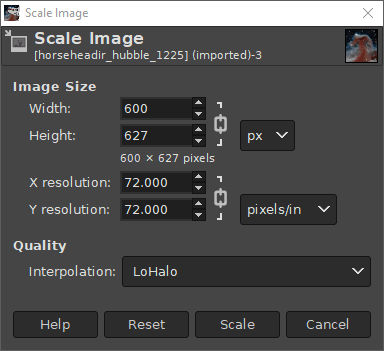
- Resize: Navigate to Image > Scale Image. Enter width, height, or percentage, and select an interpolation method. Lock the aspect ratio to avoid distortion.
- Save: Export via File > Export As in your preferred format.
Pros:
- Free and open-source with professional-grade features.
- Supports batch processing with plug-ins.
- Extensive community support and customization.
Cons:
- Steeper learning curve for beginners.
- The interface feels less polished than modern apps.
- needs a large amount of disk space.
Ideal for: Those who require batch resizing or are experienced users.
4. Photos App - Mac Default App
Another built-in macOS tool, the Photos app, provides basic resizing via its export feature. It's perfect for users who want to manage photos in their library, including those taken during FaceTime or screen captures.
How to Use:
- Import Image: Open Photos and import your image if it’s not already in the library.
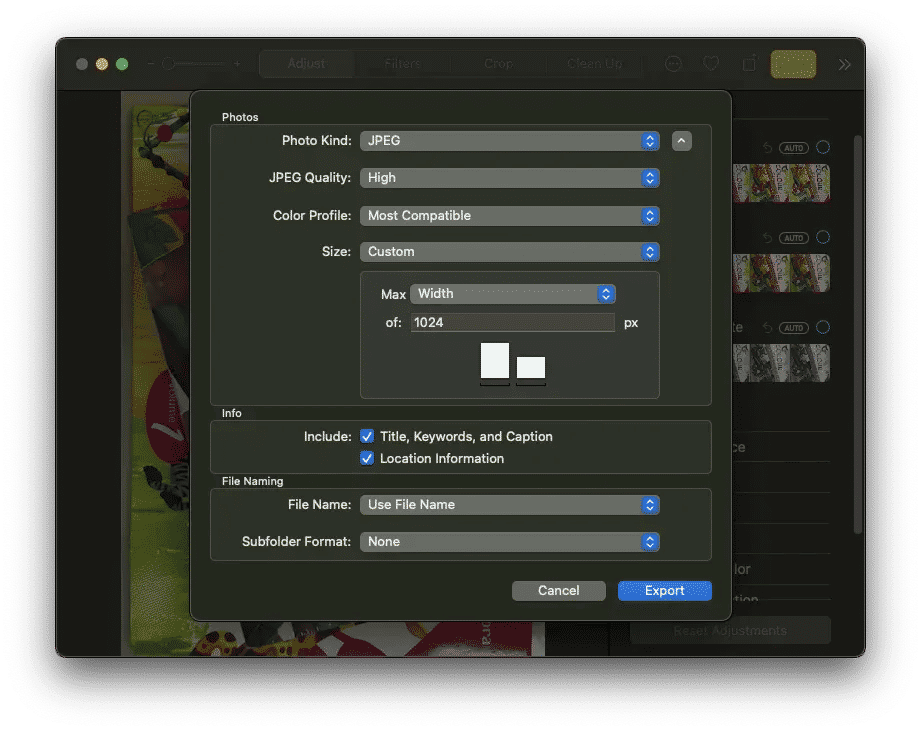
- Export with Resize: Click File > Export > Export 1 Photo after selecting the image**.** In the export dialog, choose Custom under Size and set the maximum width or height.
- Save: Choose the quality, save location, and format (JPEG, PNG, etc.).
Pros:
- Integrated with macOS and free.
- Easy for anyone who uses the Photos library.
- keeps the original image quality intact while exporting.
Cons:
- Resize options are limited to the maximum width and height.
- No batch resizing is done directly.
- Needs pictures to be imported into Photos.
Ideal For: People who use the Photos ecosystem.
The macOS Terminal provides the sips (Scriptable Image Processing System) command for image resizing for more experienced users. This built-in, free option is perfect for scripting repetitive tasks because it has batch processing capabilities.
How to Use:
- Open Terminal: Select Applications > Utilities to open Terminal.
- Resize Single Image: Run ```sips -z 800 600 image.jpg```, where -z sets max height (600) and width (800) while maintaining aspect ratio.
- Batch Resize: Use ```sips -Z 640 *.jpg``` to resize all JPEGs in the current directory to a max dimension of 640 pixels.
- Save: Sips overwrite originals by default. To save a copy, use --out newfile.jpg (e.g., sips -z 800 600 image.jpg --out resized_image.jpg).
Pros:
- Free and built into macOS.
- Fast and efficient for batch processing.
- Perfect for automation and scripting.
Cons:
- Requires command-line knowledge.
- No graphical interface.
- Risk of overwriting files if not careful.
Best for: Power users and developers comfortable with the command line.
Additional Tips for Resizing Images on Mac
- Maintain Aspect Ratio: Always enable Scale Proportionally or Constrain Proportions to avoid distorted images.
- Choose the Right Format: Use JPEG for photos (smaller file size), PNG for transparency, or TIFF for lossless quality.
- Backup Originals: Before resizing, especially with tools that overwrite files (e.g., ImageOptim, sips), back up your original images to avoid data loss.
- Quality vs. File Size: For web, aim for 72 DPI and smaller dimensions (e.g., 1920x1080 or less). For print, use 300 DPI and larger dimensions.
- Batch Processing: Tools like BatchPhoto, GIMP, Automator, and sips excel at resizing multiple images simultaneously.


