
Unlock Google's Hidden Powers: Calculator, Unit, and Currency Converter Hacks
Discover how to use Google as a free calculator, unit converter, and currency tool. Quick tips to save time on everyday math and conversions.
Avoid losing valuable points due to small formatting errors in your papers, assignments, or essays. While a minor formatting mistake might seem harmless, it can have a significant impact on your grade, especially if the person grading your work is particularly meticulous. Even though formatting may seem like a minor detail, it plays a crucial role in academic writing, and errors can leave a negative impression.
Even experienced academics occasionally need to refresh their formatting skills, particularly when using tools like Google Docs for the first time or working on a formal assignment. If you're new to Google Docs or it's your first time using it for an academic task, it's essential to familiarize yourself with the formatting features and ensure everything is set up correctly.
Different academic institutions, departments, and publishers follow various style guides, so it’s crucial to double-check what specific formatting standards are required for your work. These guidelines can vary widely, and getting the formatting right is just as important as the content itself.
If your assignment requires MLA formatting and you're working in Google Docs, don't worry we've got you covered with step-by-step instructions to help you perfect your document and meet all the necessary MLA formatting requirements.
MLA format, short for Modern Language Association format, is a widely used set of guidelines for formatting academic and research papers. Originally introduced by the Modern Languages Association, it was primarily used in the fields of literature and language. Today, however, the MLA style has become a standard for many academic disciplines, ensuring consistency and uniformity in the presentation of written works.
The purpose of MLA formatting is to help organize your paper in a way that is clear, easy to read, and properly aligned with academic standards. Whether you’re a student writing your first research paper or an experienced scholar, mastering MLA format is essential for presenting your work professionally.
In most cases, Google Docs automatically sets your document to one-inch margins by default, but it's always a good idea to double-check and make sure everything is properly configured. Setting your margins correctly is essential for adhering to MLA formatting guidelines and giving your paper a clean, professional appearance.
Here’s how you can easily confirm or adjust your margins in Google Docs:
Now your document will be formatted correctly with one-inch margins, giving it that polished, professional look required by MLA style. Just a few simple clicks, and you're all set!
To maintain MLA formatting, it’s important to use the standard font and size for your document. Google Docs allows you to easily adjust these settings. Here’s how to set the font to Times New Roman and the size to 12:
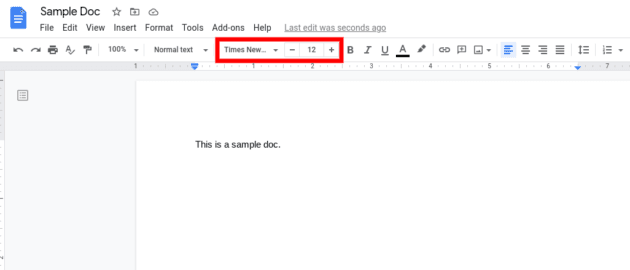
With just these two adjustments, your document will be perfectly formatted according to MLA standards!
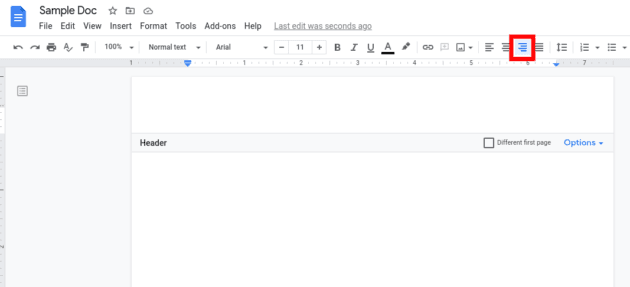
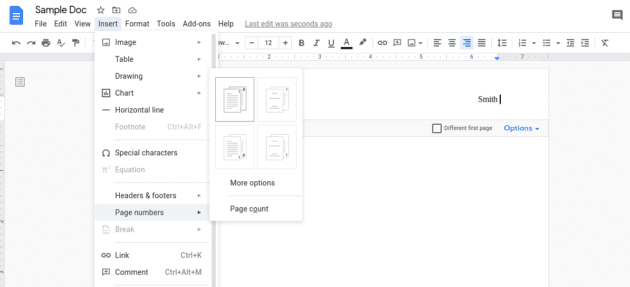
If your font defaults back to the original go ahead and highlight your last name and the page number and change them to Times New Roman, size 12.

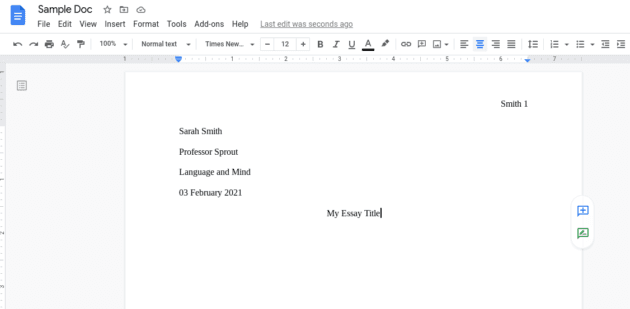
Indent Paragraphs
Indent Block Quotations

Format the Works Cited Page
The Works Cited page requires specific formatting, so it’s important to follow the steps carefully to ensure it’s properly set up. One key detail is that the Works Cited page must appear on its own separate page.
Add a Page Break
To create this, you need to insert a page break after the final paragraph of your paper. Here’s how to do it:
This will move your Works Cited list to a new page, keeping your document neatly organized and following MLA guidelines.
Add the Title
As with the main title, the title for this page needs to be centrally aligned.
Add Your List of Sources
Follow MLA Guidelines for the Works Cited Page
To ensure your Works Cited page is formatted correctly, there are a few key MLA guidelines to follow. First, make sure your sources are listed alphabetically by the author’s last name. Be sure to cite each source in the proper format, such as:
Pinker, Steven. The Sense of Style. Penguin Random House, 2014.
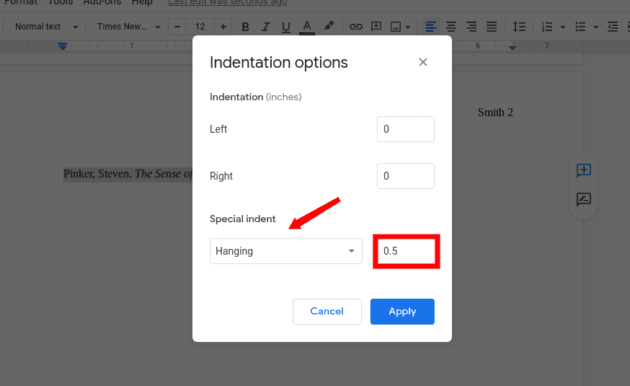
Additionally, each entry should have a hanging indent. Here's how to format it in Google Docs:
This will give your Works Cited page a clean, professional look, with each entry properly formatted and easy to read.
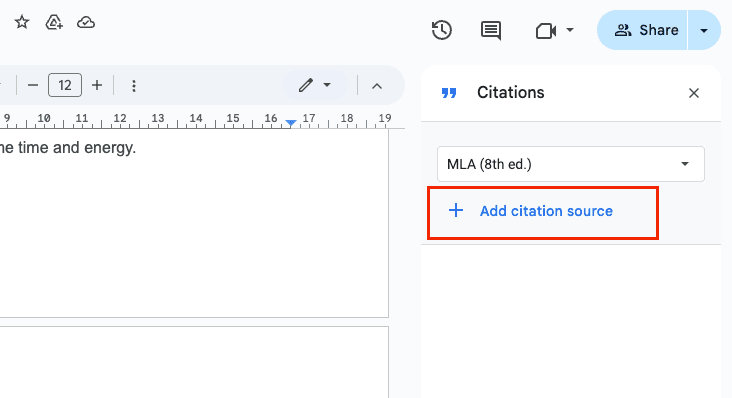
Google Docs has a citations tool that will help you cite your sources in the proper format as you go along. You can also use this tool to automatically create a Works Cited page when you’ve finished your paper. Naturally, this is super useful as it will help you get the formatting correct every time and save you some time and energy.
You’ll now see that Google Docs has automatically generated a list of sources in the correct MLA formatting based on the information you entered. You will need to change the title from Bibliography to Works Cited.
You may wish to double-check the formatting of the page for yourself. But, apart from the title, everything should be formatted correctly. Docs even adds in the hanging indentation which, of course, you need for your Works Cited page in MLA format.
By far the simplest and quickest way to format your paper is to use a pre-formatted template. Google Docs has a number of templates in different academic styles, including MLA.
The template comes with some text as a placeholder. You just need to replace it with your own details and writing. Here’s how to find and open up the template:
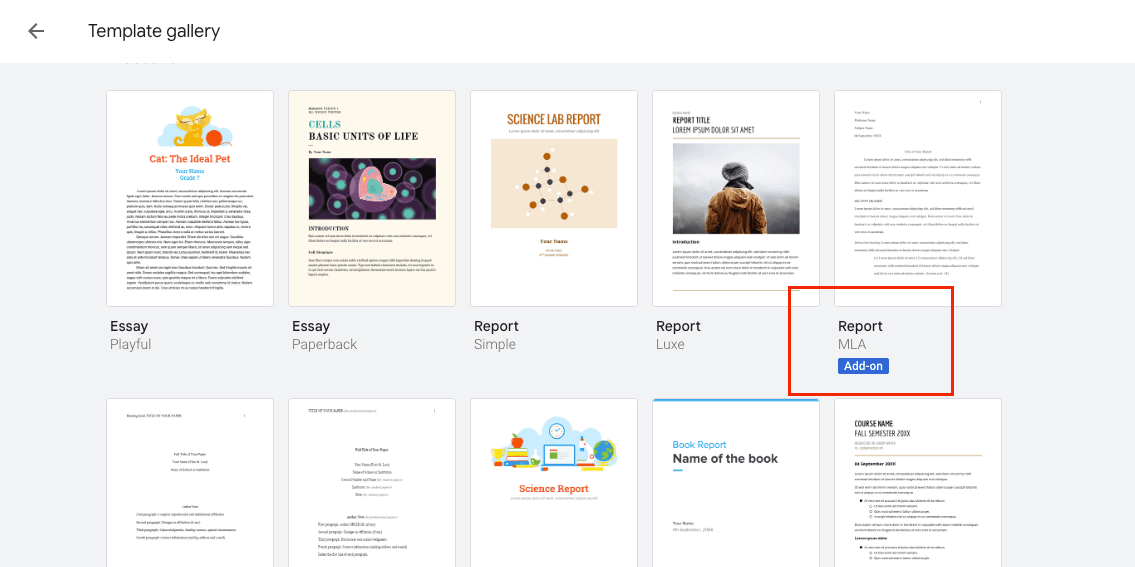
Note that you may still need to go to the checklist above and double-check that everything is formatted correctly. For example, there isn’t a placeholder for your last name in the header of the template. Thus, you may forget the little things like this if you don’t check through the doc.
Formatting your paper or essay correctly in Google Docs may seem like a challenge at first, but with a little practice, it will soon become second nature. This guide is here to help you master the basics of the MLA style and get everything just right.
While it’s up to you whether you use the MLA template in Google Docs, we recommend manually formatting your work in MLA style if you have the time. This way, you can be confident that your paper is free from any formatting errors.
Lastly, don’t forget that Google Docs offers a wealth of helpful features that can assist you during the writing, editing, and formatting stages. Take some time to explore all the tools Google Docs has to offer.