

Unlock Google's Hidden Powers: Calculator, Unit, and Currency Converter Hacks
Discover how to use Google as a free calculator, unit converter, and currency tool. Quick tips to save time on everyday math and conversions.
Screenshots are a quick way to capture and share information, whether it's a funny meme, a work document, or a tutorial. But raw screenshots often need a little polish to look professional or highlight key details. From cropping out distractions to adding text or drawings, editing screenshots is easy with the right tools. This guide walks you through simple methods to edit screenshots on Windows, Mac, Android, and iPhone devices, using built-in tools that anyone can master.
Windows offers two solid options for editing screenshots: the Snipping Tool and Microsoft Paint. Both are free and user-friendly, perfect for quick edits.
The Snipping Tool is a go-to for capturing and editing screenshots on Windows. To get started, type “Snipping Tool” into the search bar next to the Start menu and open it. Click “New” to capture a specific area of your screen by dragging the cursor. Once captured, the screenshot opens in the Snipping Tool window.
Use the pen tool to draw or circle important areas, choosing from a range of colors. The highlighter tool lets you emphasize text or sections, while the eraser removes any mistakes. When you’re done, click “File” > “Save As,” name your file, and save it. This tool is ideal for precise captures and basic annotations.
For more tips on optimizing your Windows experience, check out our guide on how to force quit on Mac for similar troubleshooting tricks across platforms.
If you want more editing flexibility, Microsoft Paint is a classic choice. Press the “PrtScr” key to capture your entire screen, then open Paint by typing “mspaint” into the Windows Run tool (Win+R). Paste the screenshot (Ctrl+V) and start editing.
You can rotate the image, resize it by percentage or pixels, or crop it by selecting an area and clicking “Crop.” Add text with the “A” tool or draw shapes and lines using the brush or shape tools. Pick colors from the palette to customize your edits. Once finished, go to “File” > “Save As” to save your work. Paint is great for users who want a bit more creative control.
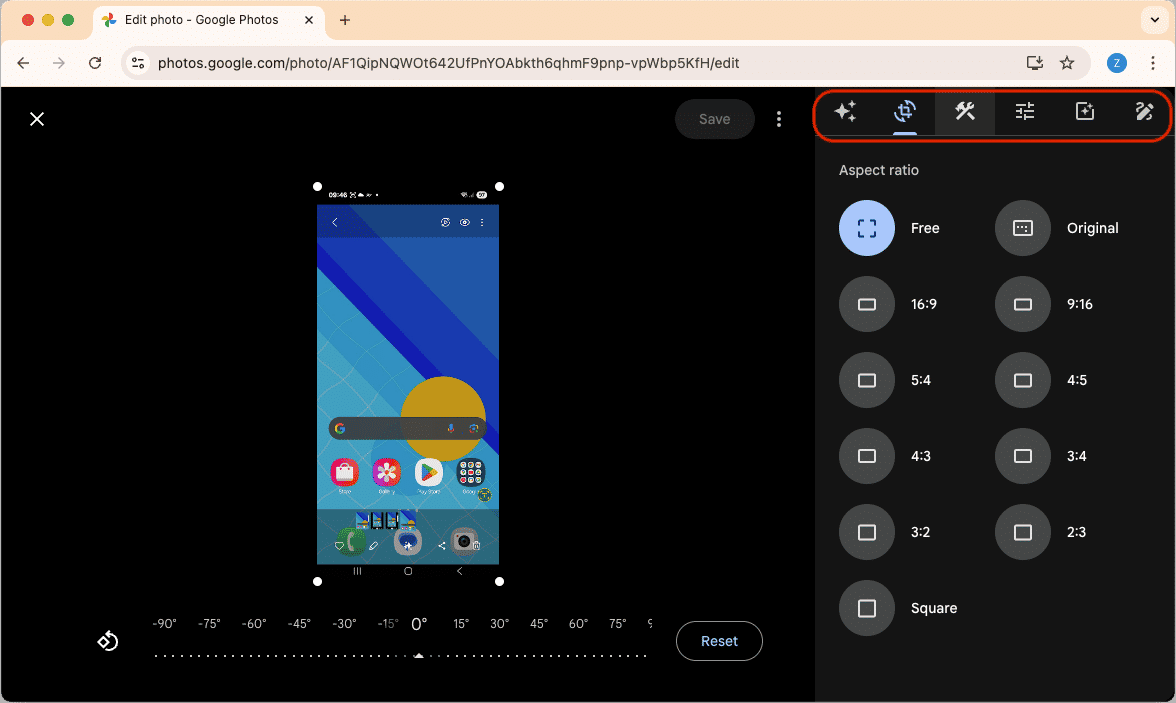
Google Photos makes editing screenshots in your browser quick and easy. Take a screenshot (e.g., PrtScr on Windows or Shift+Command+3 on Mac), then go to photos.google.com and sign in. Upload the screenshot by clicking “Upload,” then select it.
Click the “Edit” (pencil) icon to crop by dragging corners, rotate with the circular arrow, or adjust brightness and contrast with sliders. Apply filters or use the “Markup” tool to draw or add text. Click “Save copy” to store your edits.
Mac’s Preview app is a powerful, built-in tool for screenshot editing. To capture a screenshot, press Shift+Command+3 for the full screen or Shift+Command+4 to select a specific area. The screenshot saves to your desktop. Double-click it to open in Preview.
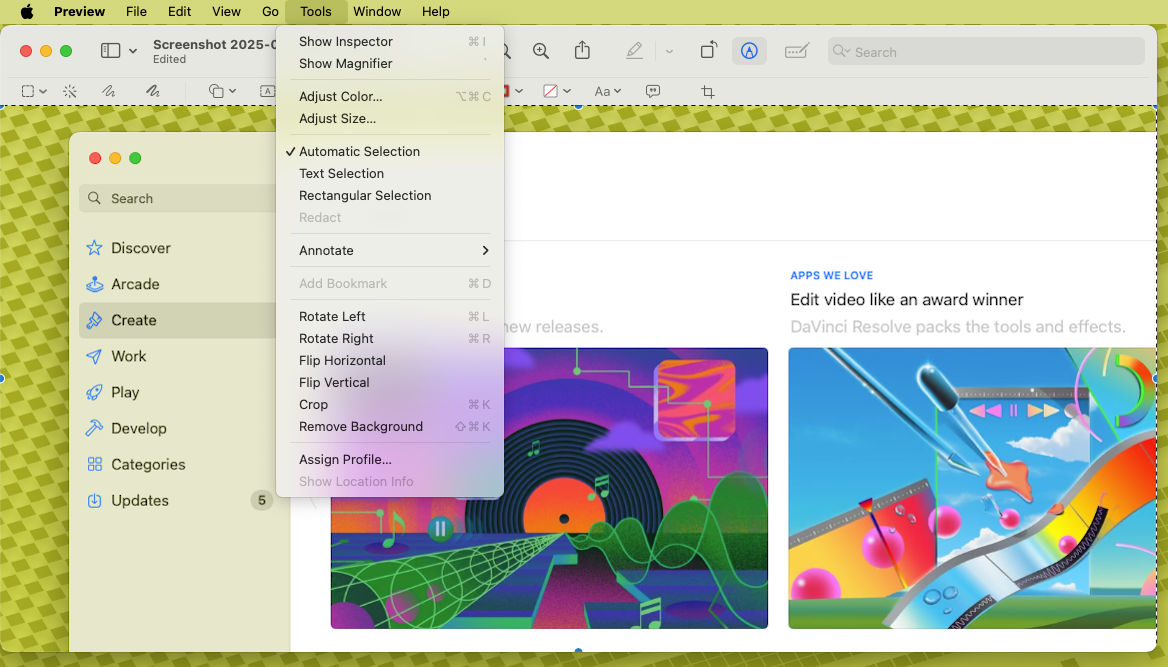
In Preview, crop the image by dragging the selection tool and choosing “Tools” > “Crop.” Adjust size via “Tools” > “Adjust Size” or tweak colors and brightness with “Tools” > “Adjust Color” for sliders like exposure and saturation. Add text, shapes, or freehand drawings using the toolbar’s “A,” pen, or shape icons. Save your changes by clicking “File” > “Save.”
Explore more option like Remove Background, Annotate, Text Selection, etc.
Android devices make screenshot editing a breeze, especially with Google Photos or built-in gallery apps on devices like Samsung Galaxy.
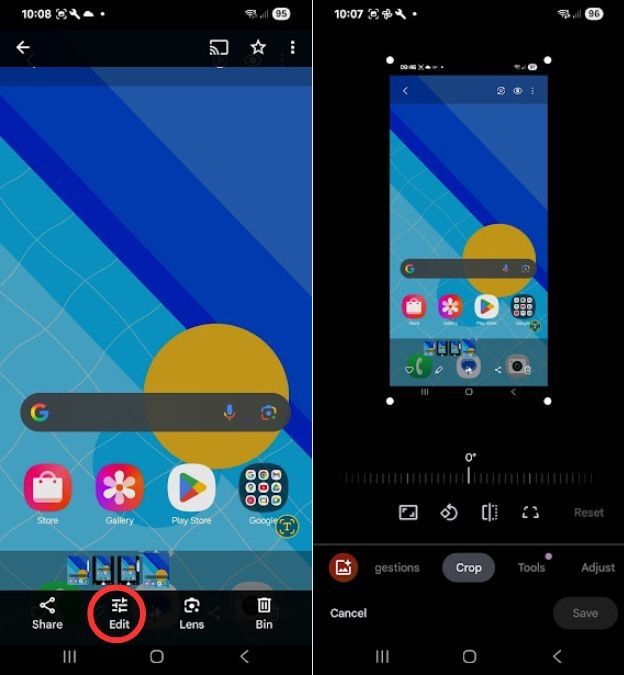
Take a screenshot by pressing the Volume Down and Power buttons together. Open the Google Photos app, find your screenshot, and tap the edit button (three sliders). Crop the image by dragging the corners, rotate it with the curved arrow, or adjust lighting and color with sliders for brightness and saturation. Apply filters for a quick style boost. Tap “Save” when done.
If you’re an Android user, you might also find our guide on how to fix Android phone charging issues helpful for device maintenance.
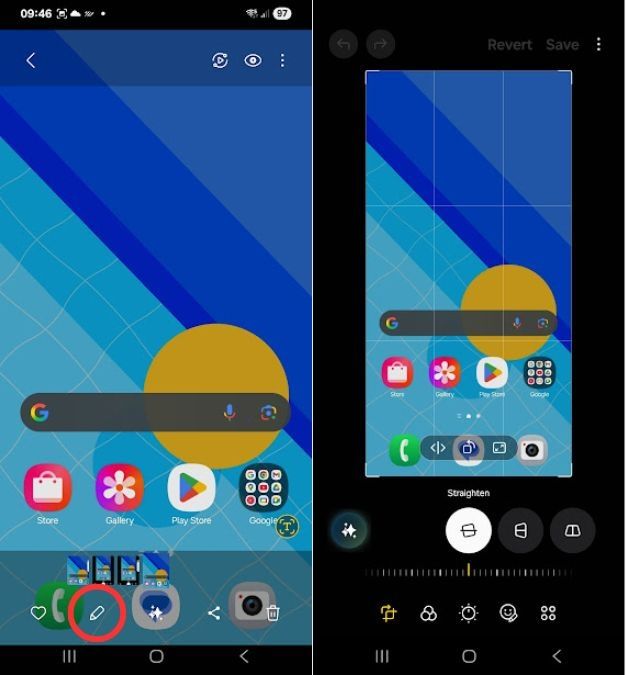
On a Samsung Galaxy, capture a screenshot the same way, then open it in the Gallery app. Tap the pencil icon to access editing tools. Crop by dragging the box, rotate via the menu, or add effects and drawings. Save your changes with the “SAVE” button. The Gallery app’s intuitive interface makes it perfect for quick mobile edits.
Apple’s Markup tool and Photos app make editing screenshots on iPhone or iPad seamless and fun.
After taking a screenshot (Side+Volume Up for Face ID devices, or Home+Power for Touch ID), tap the preview at the bottom-left corner. Use the blue borders to crop, draw with the marker or pencil tools, or add text and shapes via the “+” icon. You can even sign the screenshot with the signature tool. Tap “Done” and “Save to Photos” to keep your edits.
If the preview disappears, open the Photos app, select the screenshot, and tap “Edit.” Use the marker icon for annotations or the dial icon to adjust light, color, or black-and-white settings. Apply filters for artistic effects or crop and rotate with the rotation icon. Tap “Done” to save.
Editing screenshots doesn’t have to be complicated. Whether you’re on Windows, Mac, Android, or iPhone, built-in tools like Snipping Tool, Preview, Google Photos, and Markup make it easy to crop, annotate, and enhance your captures. Experiment with these tools to create polished screenshots that stand out.


