

Unlock Google's Hidden Powers: Calculator, Unit, and Currency Converter Hacks
Discover how to use Google as a free calculator, unit converter, and currency tool. Quick tips to save time on everyday math and conversions.
Whether you are a content creator looking to make tutorials or a marketer preparing presentations, being able to efficiently record your screen and audio on a Mac is essential. In this post, we’ll walk you through the easiest ways to do this, keeping it simple and practical.
Recording your screen, especially with audio, lets you create high-quality content without the need for external cameras or complicated software. From product demos to marketing pitches, having this skill can save you time and elevate your content.
Starting with macOS Mojave, Apple introduced a simple yet powerful screen recording tool that’s built right into the operating system. No need to install anything extra.
Open the Screen Recording Tool
Press CMD + Shift + 5. This opens up a menu at the bottom of your screen with multiple options.
Select What to Record
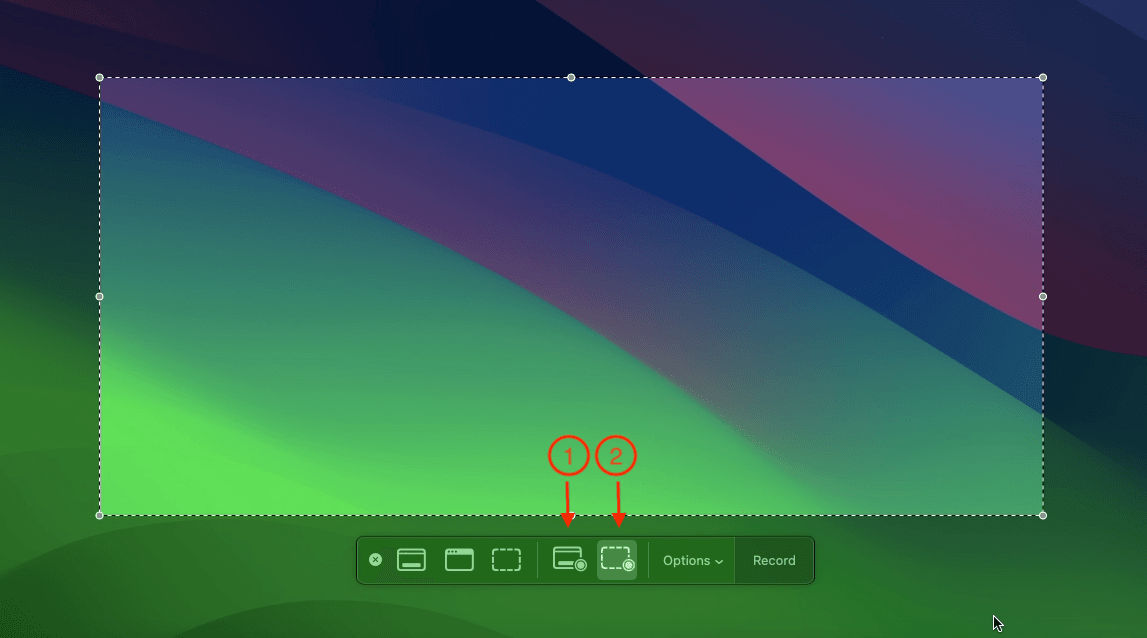
Choose whether you want to record the (1) entire screen or just (2) a portion of it. You can drag to select the part of the screen to record. When entire screen is selected, mouse cursor will turn into camera icon, click on screen anywhere to start recording.
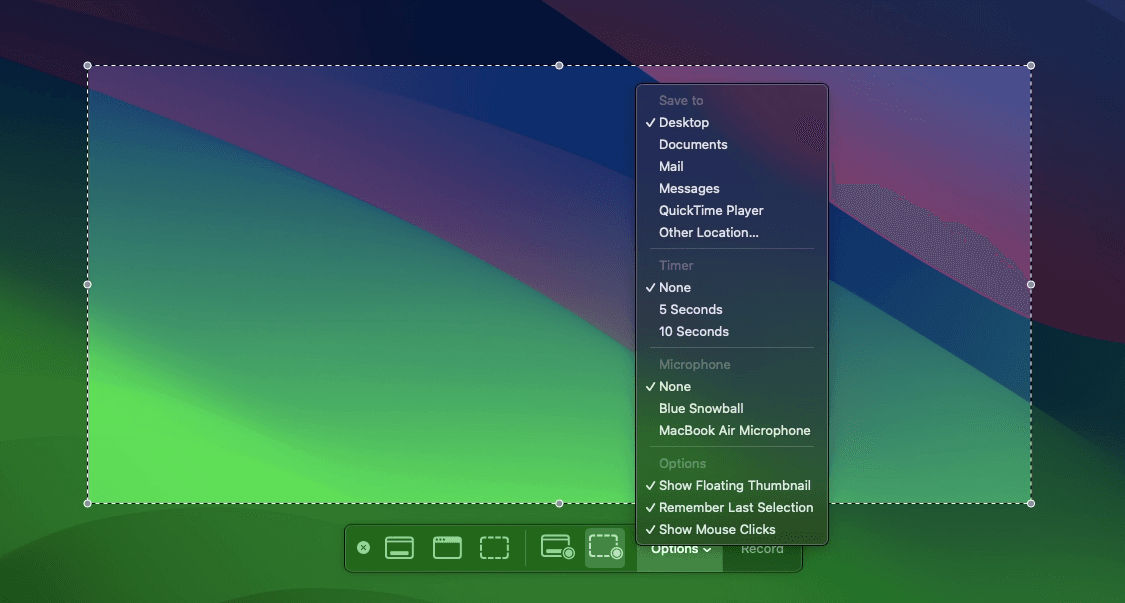
Adjust Options
Click on the "Options" button to adjust settings like where the file will be saved, record mouse cursor, record click and select microphone options.
Start Recording
Once you're ready, hit the "Record" button to begin capturing your screen. The recording will continue until you manually stop it.
Stop Recording
When you're done, click the small stop icon in the menu bar, or press CMD + Control + Esc to stop.

This method is perfect for quick tasks, recording presentations, or tutorials when audio isn't required.
QuickTime Player is another pre-installed app on every Mac that allows you to record the screen.
Open QuickTime
Launch QuickTime Player from the Applications folder.
Start a New Screen Recording
Click File > New Screen Recording.
Choose What to Record
Just like the built-in tool, you can select either the entire screen or a specific portion.
Begin Recording
Click the record button to start.
Stop Recording
Hit the stop button in the menu bar when you are done.
Quick Time screen record tool come with list of options to choose with such as choose file save location, select microphone, record mouse and few more.
Screenshots are another essential tool for content creators and marketers. Here’s how to capture still images on your Mac. This tool, just like the screen recording tool, allows for versatile screenshot options.
Open the Screenshot Menu
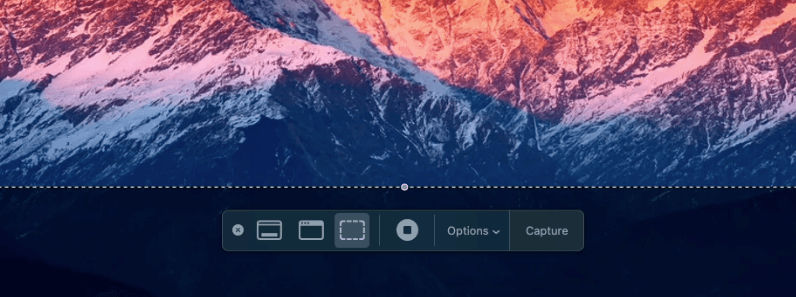
Press CMD + Shift + 5.
Choose What to Capture
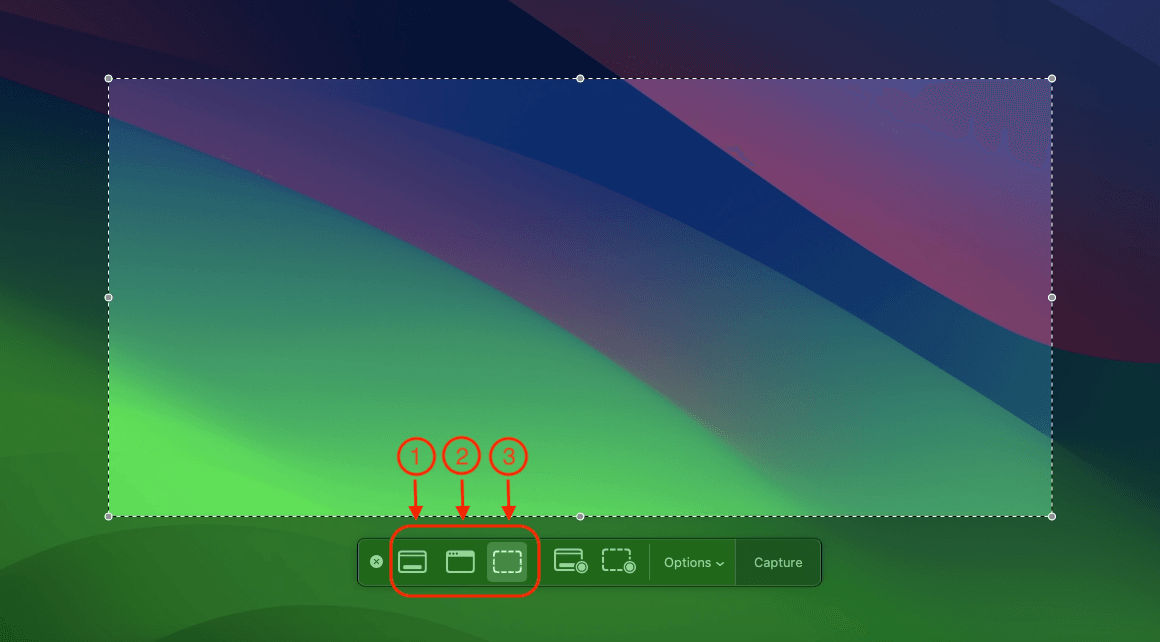
You will see options to capture the (1) entire screen, (2) a selected window, or just a (3) specific portion of the screen.
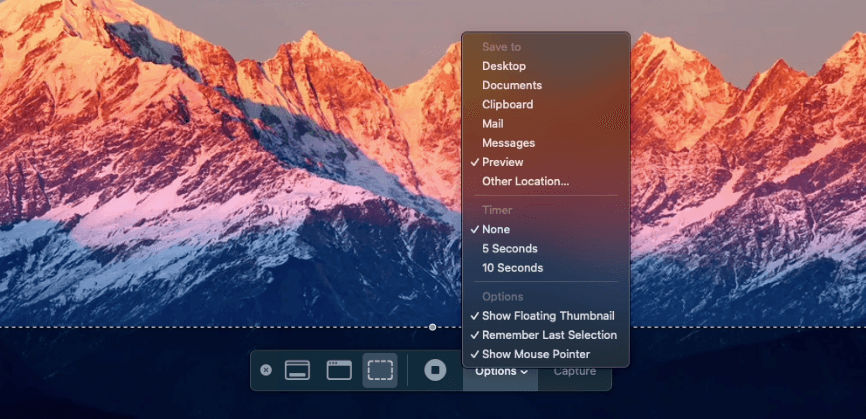
Adjust Settings: Click "Options" to adjust where to save the screenshot or set a timer.
Take the Screenshot: Once you’ve made your selection, click the capture button, and the screenshot will be taken.
While QuickTime and macOS built-in tools are convenient, there are some excellent free tools you can try if you need more advanced features like editing, live streaming, or higher quality output.
OBS Studio is a powerful, free, and open-source tool that allows you to record both your screen and audio with a lot of customization options.

OBS Studio is also available on Window for screen recording.
Loom is a free tool that makes screen recording incredibly easy. It also offers a Chrome extension, so you don’t even need to download any software.
Note Free edition of Loom will be sufficient for this task.
Whether you are looking to capture your screen for tutorials, record audio for marketing materials, or just take quick screenshots for a presentation, your Mac has all the tools you need. And for those who need a bit more flexibility, third-party tools like OBS Studio and Loom offer additional features to suit your content creation needs.
With these easy-to-follow steps and tools, you will be able to screen record, record audio, and take screenshots like a pro in no time.


