Unlock Google's Hidden Powers: Calculator, Unit, and Currency Converter Hacks
Discover how to use Google as a free calculator, unit converter, and currency tool. Quick tips to save time on everyday math and conversions.
If you're looking for easy ways to record your screen on Windows 11, you're in the right place. Whether you need to capture a tutorial, save a gaming session, or share a presentation, Windows 11 offers multiple built-in tools to help you get started. Additionally, we’ll cover some free third-party options for those who need extra features. This guide will show you step by step how to screen record on Windows 11, including how to record with audio.
One of the easiest ways to record your screen on Windows 11 is by using Clipchamp, Microsoft’s built-in video editor. Clipchamp offers screen recording capabilities alongside powerful editing tools, making it a great all-in-one solution.
Steps to record your screen with Clipchamp
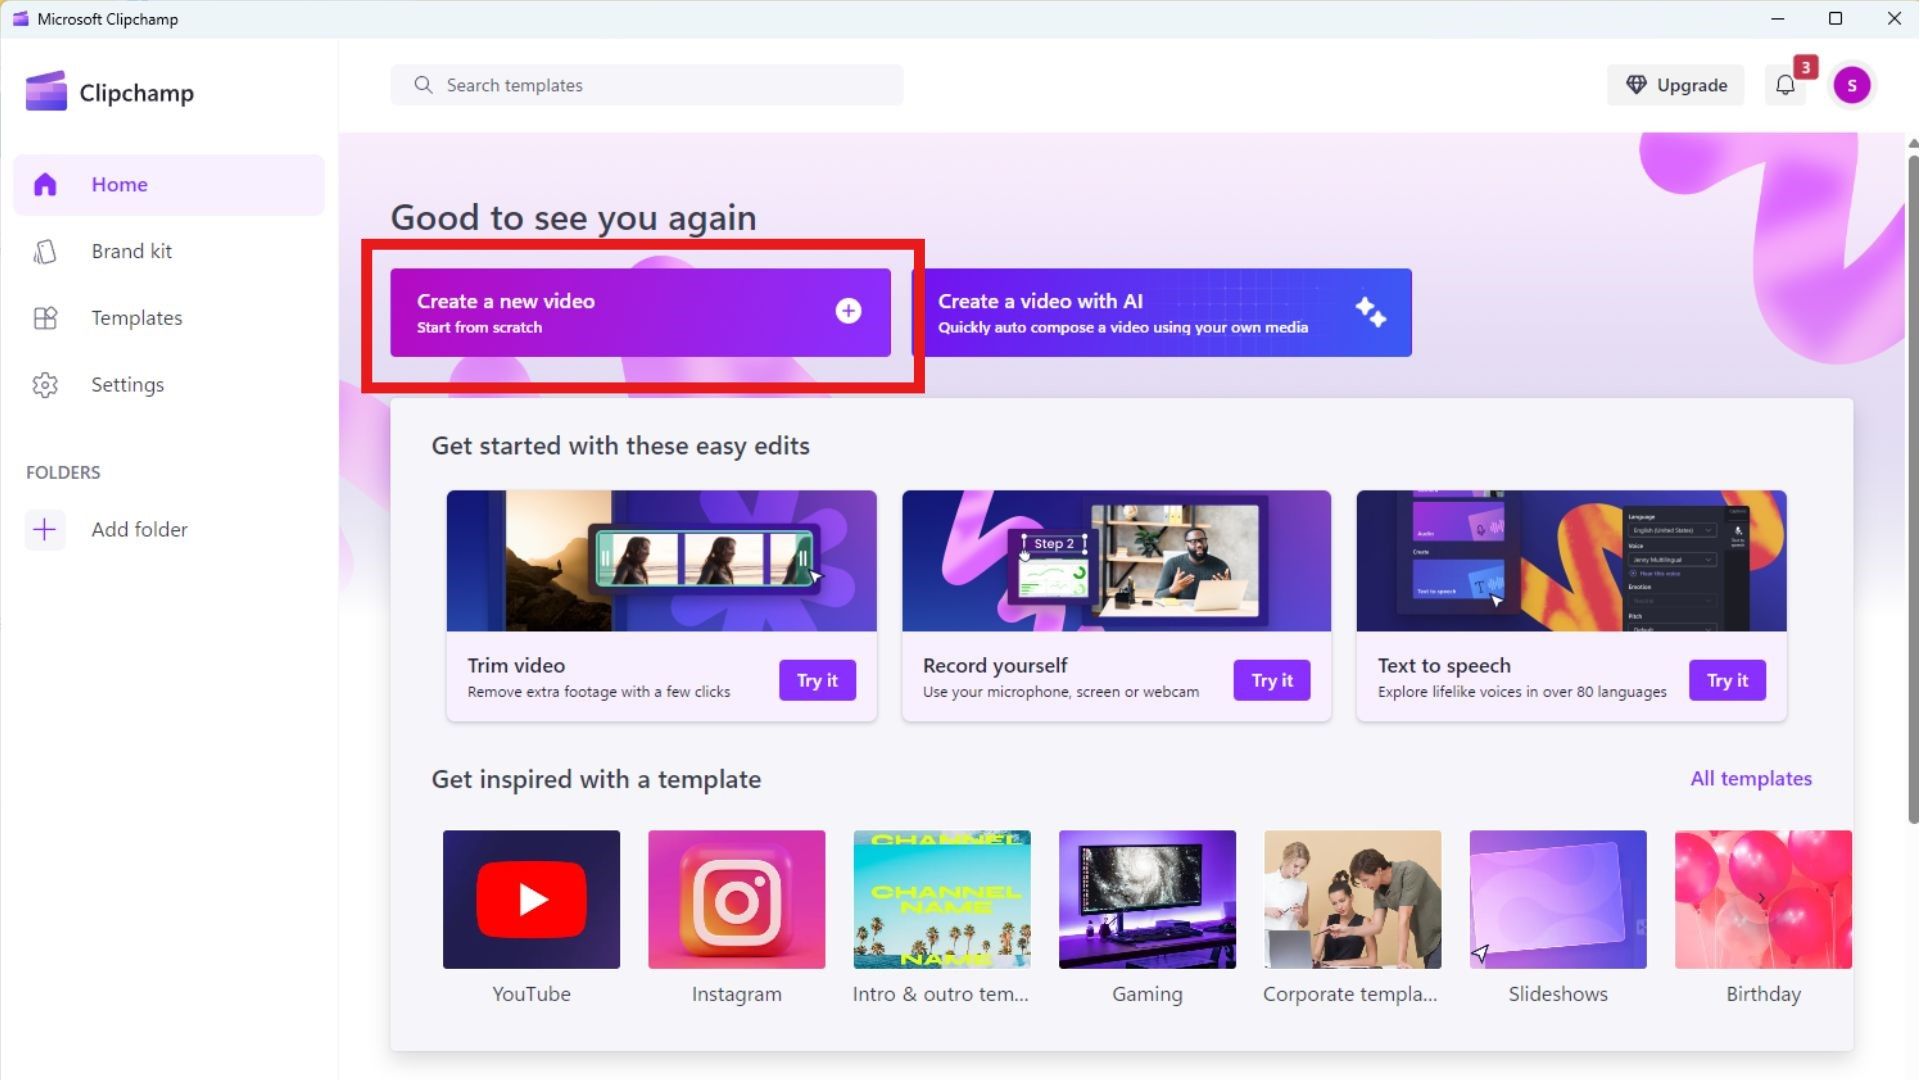
Open Clipchamp by searching for it in the Start menu.
Click Create a new video on the home screen.

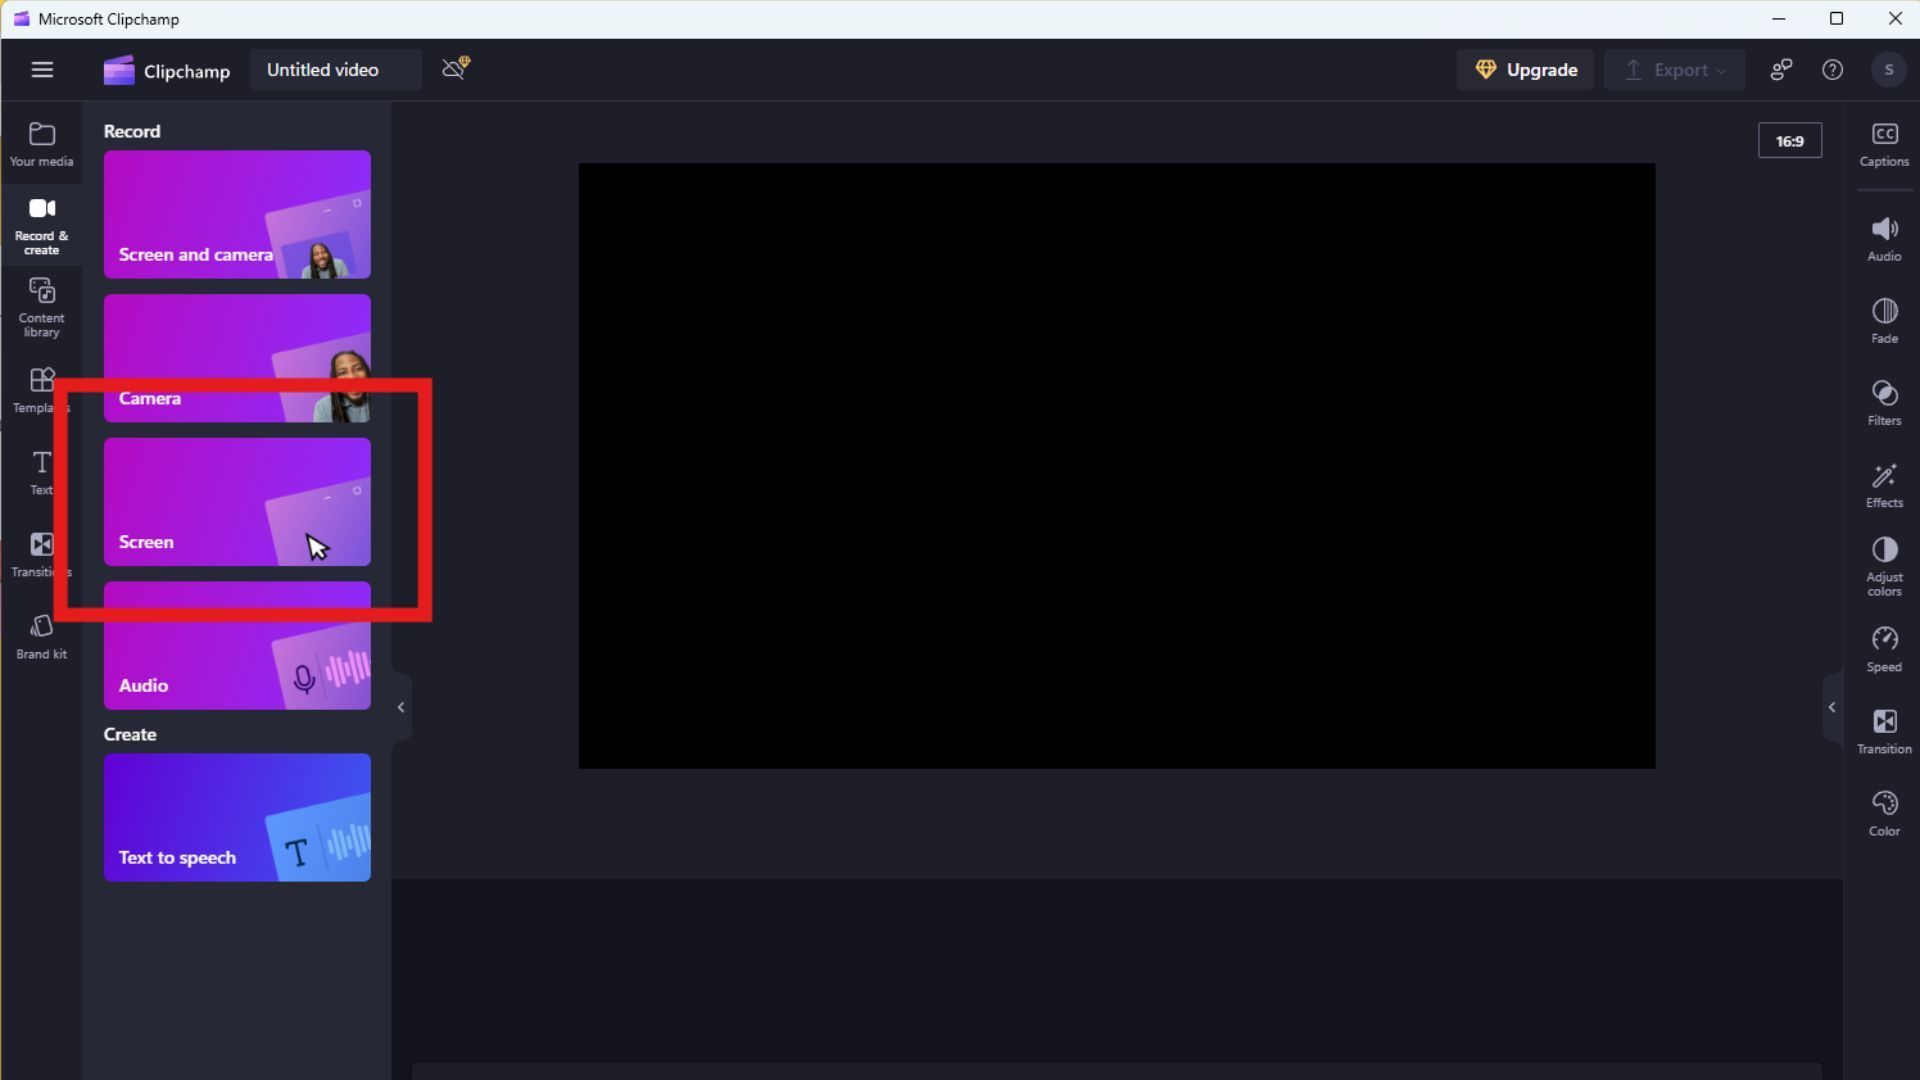
In the left-hand menu, click Record & Create, and choose Screen then hit the red record button.
Select whether to record the Entire screen, a Specific window, or a Browser tab.
Press Share to start recording.
After recording, click Stop, and the video will automatically load into the Clipchamp editor.
Here, you can edit the video (trim, add text, etc.), then click Export to save it.
If you're wondering how to record screen on Windows 11 with audio, Clipchamp allows you to capture both system audio and microphone input during the recording.
ClipChamp comes pre-installed with Windows 11 and offers a free version packed with features. It also has a premium edition with 4K export options and additional advanced features.
Buy Primium edition at ClipChamp→Windows 11 has a built-in tool designed for gamers but is also useful for general screen recording. The Xbox Game Bar makes it easy to capture your screen, whether you're recording an app, a game, or a browser.
Steps to use Xbox Game Bar
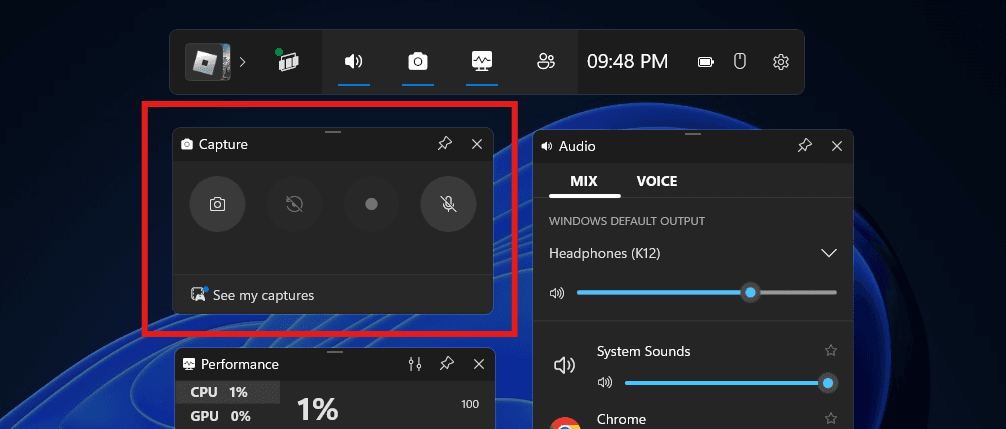
Press `Win + G` to open the Xbox Game Bar overlay.
Click the Capture widget (camera icon) in the toolbar.
Press Start Recording or use the shortcut `Win + Alt + R` to begin.

To include audio, enable the microphone by clicking the microphone icon.
Press `Win + Alt + R` again or click Stop to end the recording.
Your recordings will be saved under Videos > Captures.
Bing AI Image Generator, developed by Microsoft, is a great option for creating images for your blog or video content.Keep in mind, that Xbox Game Bar cannot record your desktop or File Explorer. For those tasks, see the options below.
A surprising way to record your screen on Windows 11 is through Microsoft PowerPoint. If you already use PowerPoint for presentations, you can also use it to record your screen, perfect for creating tutorial videos or slide recordings.
Here’s how to use PowerPoint for screen recording
Open PowerPoint and create a new presentation.
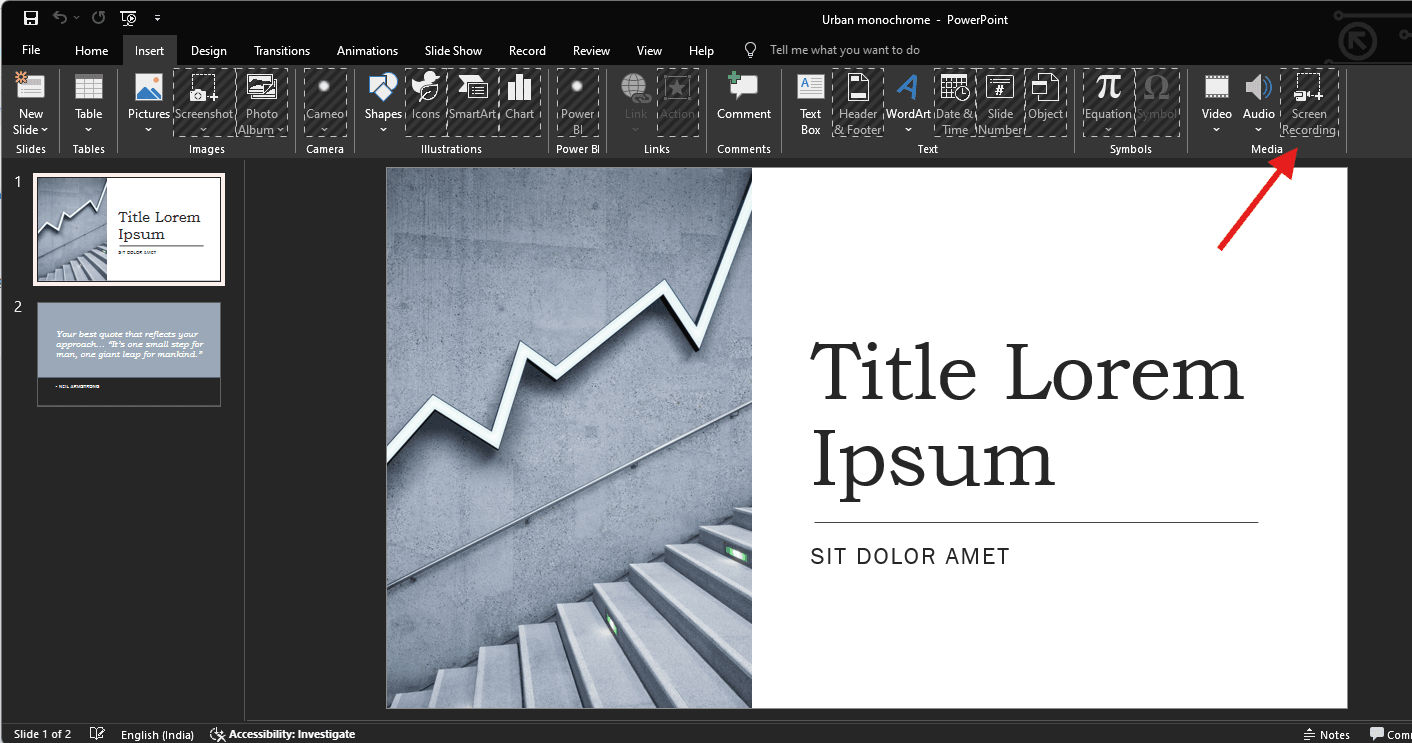
Go to the Insert tab and click Screen Recording.

Select the part of the screen you want to record.
Click Record to start and use `Win + Shift + Q` to stop.
You can save the recording as a standalone video by right-clicking the embedded video in your slide and selecting Save Media As.
For more advanced recording options, OBS Studio is a free, open-source tool that offers robust features. It’s especially popular with content creators and streamers who need to capture high-quality video and audio.

Steps to record with OBS Studio
If you're looking for a versatile solution for how to record screen on Windows 11 with audio, OBS Studio offers complete control over audio and video settings.
OBS Studio is also available on macOS for screen recording.
For a lightweight, easy-to-use option, ShareX is a free tool that supports both screen recording and screenshots. ShareX is perfect if you need basic screen capture without heavy features.
Steps to record with ShareX